Sunday, May 22, 2011

Update on Pasture Rabbits


Here are some videos I shot this weekend of my rabbits on pasture and a NZ doe giving birth to 11 kits.

I am trying to get better at HTML and writing better blog posts but for now I am just trying to get the info out there and I will make it look pretty later.
These are some of our new PVC pens that are lighter and easier to move.
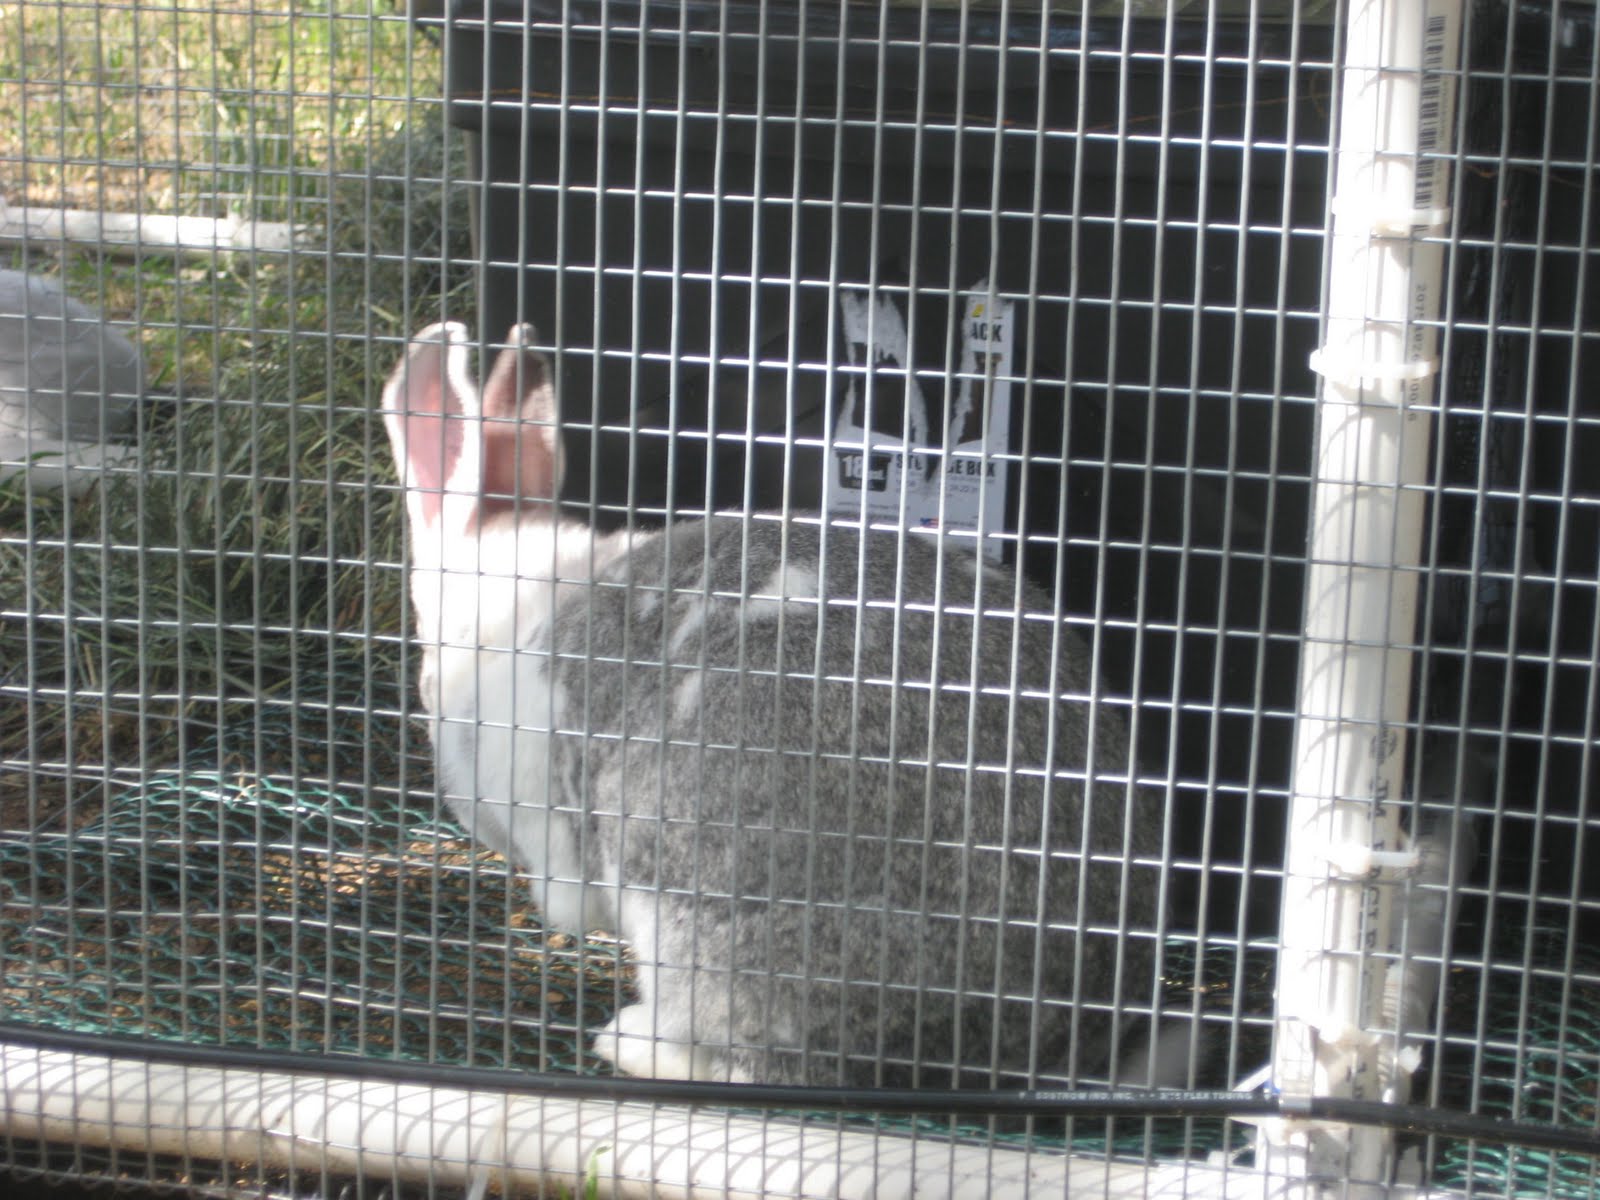
A couple of our pens under the shade of the tree

You can see our mister hanging from the tree.  We turn this on when it gets hot and we need to chill the rabbits out.


Here is a good picture of a a couple of our pens under the shade of the tree.


One of our new beautiful NZ red does.

Cali doe just chillin out
Our guard dog in action protecting the herd.


Each pen as an axle installed to which we can attach a wheel to move the pens with the tractor.

Our watering system


Pasture staring to come up, in a couple weeks we will move then pens over it and let the rabbits start to munch.

Saturday, May 7, 2011

Recipe repost from http://www.raisingrabbitsebook.com/

Meat Rabbits News
Teaching you everything you need to know about raising rabbits to survive
reposted from http://www.raisingrabbitsebook.com/

Grilling rabbit is often one of the quickest and easiest ways of cooking rabbit. Young, tender meat rabbits are best for grilling, whereas older, larger rabbits are a bit tougher and should be used for braises instead. If you're not raising your own rabbits, ask some of your local butchers if they have rabbit meat available. You just might be pleasantly surprised.

This recipe combination from The Examiner is practical for couples or for those who have a couple rabbits available to throw on the grill but aren't sure what to do with all the meat. Making risotto can be a tedious task and you want to pay close attention to the rice. The liquid must be added slowly, then allowed to completely absorb into the rice before you add more liquid.
Grilled Rabbit with Rosemary & Thyme
Ingredients

* 1 whole young rabbit (2-3 pounds), cut into 6 pieces
* Salt & pepper, to taste
* 3/4 cup of olive oil
* 3 cloves garlic
* 3 short sprigs rosemary
* 3 short sprigs thyme
* more salt and pepper
* Wood chips for grilling, if desired

Directions

1. One hour before grilling, liberally salt and pepper rabbit pieces. Soak wood chips, if desired.
2. Heat grill. Meanwhile, prepare marinade by blending olive oil, garlic, herbs, and salt & pepper. Brush rabbit with olive oil marinade and sear on hot grill.
3. Reduce heat to 300 with the lid down and grill for about 1 hour, brushing with marinade and turning over every 15 minutes. Use probe thermometer and follow temp standards of doneness for beef. (It will appear to be done long before it actually is. )

Grilled Rabbit and Mushroom Risotto
Ingredients

Making your own stock:

* 3 cups vegetable broth
* 2 cups water
* rabbit meat pulled from two or three pieces
* bones from the rabbit
* 1 clove garlic, smashed

The Risotto

* 1 T butter
* 1 shallot, diced
* 1/2 cup mushrooms, chopped
* 1 1/2 cups arborio rice
* 1/2 cup dry red wine
* 10 dried cherries, diced
* 2 sprigs thyme
* shaved parmesan cheese

Directions

For the stock:

1. Pull rabbit meat from leftover carcass.
2. Pour vegetable stock and water into medium pot. Add bones and garlic. Bring to a boil, then turn down to low heat.

For the risotto:

1. Heat butter over medium heat in a large skillet and add shallots. Saute about 5 minutes, then add in the mushrooms. After a couple more minutes, push everything to the sides and add rice. Mix through and let the rice soak up some of those flavors, then add the red wine. Cook about 3 minutes. Add cherries.
2. Mix in the broth 1/2 cup at a time, stirring it in over the course of 20-30 minutes.
3. After the rice cooks another 15-20 minutes, add 2 sprigs of thyme and the rabbit. Test the rice, and when it reaches the softness you like, remove the thyme. Serve with shaved paremesan and a pinch of grey salt or sea salt.

Happy eating!

Tiffany

Want more info on raising meat rabbits, sign up for the newsletter in the green box to the right

P.S. Looking for more recipes for rabbit meat? Get my recipe ebook What's for Dinner, Doc? absolutely free when you purchase the comprehensive ebook Raising Rabbits to Survive! for only $19.95. This ebook will teach you everything you need to know about raising meat rabbits from housing to butchering.

Friday, May 6, 2011

Five Excellent Meat Rabbit Breeds to Start Your Rabbitry

Posted by Tiffany on http://www.raisingrabbitsformeat.com/

There are more than 45 breeds of rabbits in the world, but only about 17 have a “commercial” (large, chubby, meaty) body type which are preferable for meat production. Characteristics which make some commercial breeds better than others are a higher meat-to-bone ratio, quick growth, fur color and ease of care.

* Californian
Adult Size: Medium (7-10 pounds/ 3.5-4.75 kilograms)
Californian rabbits were developed in the USA in the 1920’s to provide good meat and fur production. Californians are a cross of Himalayan, Standard Chinchilla and New Zealand white rabbits and are currently the second most popular meat producing rabbits in the world. The body is plump but fine-boned. Californian rabbits look very similar to the Himalayan rabbit with a predominantly white body and black on the feet, nose, ears and tail. Their average litter size is 6-8 bunnies.

* New Zealand
Adult Size: Large (8-12 pounds/ 3.6-5.4 kilograms)
Despite the name, New Zealand rabbits were first bred in America in 1916 for meat and fur production and are currently the number one meat rabbit in the United States. They come in several different colors (black, red and white) but the white rabbits are the most popular for meat production because of their large, broad, and muscular bodies. When mature, bucks weigh from 8-10 pounds and females from 9-12 pounds. New Zealand rabbits are ready to slaughter as fryers after just 2 months. Their average litter size is 8-10 bunnies.

* Florida White
Adult Size: Small (4-6 pounds/ 1.8-2.7 kilograms)
Although this rabbit is quite small, it was bred in Florida in the 1960’s as a meat rabbit which would also be functional for laboratory use. The fur is white with good density and texture, and they have a compact, meaty body, short neck, and small head.

* Palomino
Adult Size: Large (8-11 pounds/ 3.6-5 kilograms)
Palomino rabbits have a smaller bone structure than other meat rabbits which gives you a higher meat ratio. But they take a bit longer to grow. Bucks are 8-10 pounds and does usually range from 9-11 pounds. Litter size is usually 8 kits but can range from 6 to 12. Palominos come in two colors: Golden & Lynx. The Golden has an orange/brown golden color (as the name suggests) and the Lynx has a bit more grey or silver tone in the fur. They have a very docile and friendly temperament.

* Beveren
Adult Size: Medium (8-11 pounds/ 3.6-5 kilograms)
The Beveren is one of the oldest and largest breeds of fur rabbits, originating in Belgium. Their coats can be blue, white, black, brown and lilac. They are a rare breed but well tempered, clean, and smart. The fur is rather long (about 1 1/4 to 1 1/2 inches), dense and glossy. The breed is hardy and well suited for meat production because of large litter size, the young grow fairly fast, and the does are typically docile and make good mothers.

Tuesday, May 3, 2011

How to Tan a Rabbit Hide

By Anita Evangelista
October/November 2001


After hunting or processing livestock for the table, it's a shame to have to toss out a nice pelt. Here is a method of tanning hides that is low cost and low labor compared to other methods of “custom tanning.” I've personally used this system to tan sheepskins, deerskins, groundhog pelts, rabbit hides and goat skins. The procedure can be used for all kinds of mammal pelts when you want the fur to remain on the skin. It results in a soft, workable hide, which can be used as is or cut up for sewing projects.

Salting Fresh Skins
Fresh hides right off the animal should be cooled immediately. Trim off any flesh and scrape visible fat from the hide. Place the skin in the shade, laying it completely flat with the fur side down, preferably on a cold concrete or rock surface. When the skin feels cool to the touch, immediately cover the fleshy side completely with plain, uniodized salt.

Use three to five pounds for a sheep or deer skin. Don't skimp.
If skins aren't salted within a few hours of removal of the flesh, you might as well forget it. They will have begun to decompose and will probably lose their hair during processing.

Transport the skin flat. We've had problems with predators gnawing the edges of skins, so put the hide somewhere out of reach. You don't need to stretch the skin; just make sure it is perfectly flat, with no curled edges. If you've lost a lot of salt while moving the pelt, add more. The salt will draw moisture from the skin and liquid may pool in low spots. Just add more salt. Let the skin dry until it is crispy. This may take a few days to a couple of weeks. When completely dry, the skin is very stable and won't change or deteriorate appreciably.
Tanning Recipe

When you're ready to tan the skins, assemble the following:
7 gallons water
2 pounds (16 cups) bran flakes
16 cups plain or pickling salt (not iodized)
2 large plastic trash cans (30 gallon) and one lid
4 foot wooden stirring stick
3½ cups battery acid (from auto parts store)
2 boxes baking soda
wood rack or stretcher
neat's-foot oil
nails
wire bristle brush

This recipe makes enough tanning solution to tan four large animal skins; or ten rabbit skins; or about six medium-sized pelts such as groundhog. (Cut the recipe in half for fewer skins).A couple of hours before you plan to tan, soak the dried skins in clear, fresh water until flexible. Boil three gallons of water and pour over the bran flakes. Let this sit for an hour, then strain the bran flakes out, saving the brownish water solution. Next, bring the remaining four gallons of water to a boil. Put the 16 cups of salt in a plastic trash can. Pour the water over the salt and use the stirring stick to mix until the salt dissolves. Add the brown bran liquid. Stir.

When this solution is lukewarm, you are ready to add the battery acid. Read the warning label and first aid advice on the battery acid container. While wearing gloves and an old, long-sleeved shirt, very carefully pour the battery acid down the inside of the trash can into the solution — don't let it splash. Stir the battery acid in thoroughly.

At this point, you can peel off the hide's dried inner skin. If you have fresh skins, use as is. Add the skins to the solution and stir, pressing the skins down carefully under the liquid with the stirring stick until the skins are fully saturated. Leave them to soak for 40 minutes, stirring from time to time to make sure all parts of the hides are exposed to the solution. During the soak, fill your other trash can with clear, lukewarm water. After 40 minutes, soaking is complete. Use the stirring stick to carefully move the skins one by one into the other trash can. This is the rinsing process, which removes the excess salt from the skins. Stir and slosh the skins for about five minutes, changing the water when it looks dirty.

At this point, some people add a box of baking soda to the rinse water. Adding baking soda will neutralize some of the acid in the skin - this is good because there will be less possibility of residual acid in the fur to affect sensitive people. However, this also may cause the preserving effects of the acid to be neutralized. You need to make the choice to use baking soda based on your own end use of the skin. If skin or fur will spend a lot of time in contact with human skin, I'd use the baking soda. If the pelt will be used as a rug or wall hanging, I probably wouldn't.

Remove the hides from rinse water; they will be very heavy. Let them hang over a board or the back of a chair or other firm surface to drain. Now, using a sponge, rag or paint brush, swab the still-damp skin side of the hide with an ounce of neat's-foot oil. It should be absorbed quickly, leaving only a slight oily residue. Tack the hide to your "stretcher." We use salvaged wood pallets. Gently pull the hide as you tack it so there's some tension in the skin. No need to exert excess pressure or overstretch. Set the hide in a shady place to dry.

Your acidic tanning solution can be neutralized for disposal by adding a couple boxes of baking soda. It will froth and bubble vigorously and release a potentially toxic gas, so give it plenty of ventilation and get away from the bucket while this is happening. We have a small farm and generally pour the used solution on dirt driveways to keep them clear of weeds. Do not pour it down your drain.

Check the hide every day. When the skin side feels dry to the touch in the center, but still flexible and somewhat soft, take it down from the rack. Lay the fur side down and go over the skin with a wire bristle brush. This softens the skin and lightens the color. Don't brush heavily or excessively in one spot, just enough to give a suedelike appearance. After this, set the skin where it can fully dry for a day or so longer.

Once your friends know you can tan hides, be prepared for them to bring around their hunting trophies and livestock skins for treatment. If you decide to do this, take my advice: Don't do it for free. Commercial tanners get $25 to $45 to tan a hide, and you should price your work accordingly, even if your return is just a case of beer. Otherwise you'll find yourself swamped with every little skin in your region and left with no time for anything else. In exchange, your friends can expect to get a professional, quality job, with an upfront understanding about what might go wrong and what compensation you will get. People get very sensitive about their skins and this precaution will prevent potential misunderstandings and help you keep your friends.

From a 2001 issue of Backwoods Home magazine

Monday, May 2, 2011

Other Videos of Rabbit Tractors and Rabbits on Pasture

Cool Post from Stone & Thistle Farm On Raising Rabbits On Pasture

Monday, May 2, 2011


Rabbiting at Stone & Thistle Farm


Rabbit Rerun
Meat rabbits have been part of our farm family for nine years. When my children were young, we asked each of them to pick a “business” on the farm that they could manage independently. They were responsible for the whole project from daily animal care to recording revenue and expenses. We provided them with “seed” money and supervised their project. Katey picked rabbits to raise. We brought her to visit Charlie at Rabbit Tracks farm in Davenport and she chose two meat breeds: a New Zealand buck and three California Red does. Charlie showed her how to keep records for breeding, kindling and general care. We bought Raising Rabbits the Modern Way by Bob Bennett. Katey and Tom built rabbit hutches and bought feeders and water bottles.

Since Katey left home to be a working student at Welwyn Stable in Rhinebeck and abandoned her rabbits to lavish her love on horses, I have taken over her rabbit business.  The first thing I did was cull (slaughter – no waste; we ate them) any of the does (females) that were producing less than four kits (baby rabbits) per kindling (birth).  I kept young does out of two litters and bred them to the older buck. After several unsuccessful breedings and small litters of one, even two kits, I realized that the buck was too old.  In November, I culled the old buck (male) and bought a young, just old enough to breed buck.   Shane named him Bernard.

Winter is tough on rabbits so we provide the breeding does with cages in the barn and pack them tight with hay for warmth.  We wait until spring to breed them because the kits won’t survive in the sub-zero temperatures. Now that spring has arrived, it’s kindling time again! Using the young buck Bernard, I bred the does in March.  What they say about rabbits is not necessarily true.  Bernard was not interested in the does. Like Ferdinand the Bull, he was much more interested in smelling the green hay in his hutch.  He cowered in the corner of the hutch and stared at the doe intruder.  The Raising Rabbits manual suggested using younger, inexperienced does with Bernard since the older does may be intimidating and too agressive (so much for the older woman initiation theory.) Putting young does in several times with him would make him comfortable with breeding. And to get him in the "mood" the book suggested I tickle his sides.   I felt ridiculous getting a rabbit in the "mood", but the session worked and he bred the first doe’s head.  It took a few days for Bernard to figure out heads from tails but he finally successfully bred doe #1.  How do I know he was successful?  All bucks are different, but most of them seize and fall over on their side as if dead when the “deed is done.”  The first time my daughter bred a doe she ran off screaming for help believing that her buck was dead.  Thank goodness, to the best of my knowledge, she has not had therapy as a result of that incident.

I marked the due dates on the calendar (30 days from breeding) and a few days before the due dates, place nest boxes in their hutches. The boxes are filled with wood shavings and hay.  A few days before the does are due to kindle, they begin building their nests.  They gather the hay in their mouth and build a deep nest in the box. 

Doe gathering hay for her nest

The doe finishes building the nest with fur that they have pulled out from their chests. Some does begin pulling hair out weeks before their due date and they are practically bald at kindling time. Others pull their hair out a few  hours before they kindle.  I still get excited about opening the hutch in the morning and find the fur nest moving and wriggling.

The Nest box with newborn kits in a nest of fur, hay, shavings 
One day old kit


5 week old kits hopping in and out of their nest box

The doe nurses her kits only once or twice a day. In ten days, the kits open their eyes and in three weeks they are hopping out of the next box.
By six weeks, the doe is rebred and the kits are put in rabbit cages that move on pasture.


The cages are dragged on pasture twice a day. The growing kits have ample room to run and bounce. 

The Rabbit Cage Fleet 
Doe and her 5 week kits in pastured rabbit cage on the farm
The young rabbits or fryers are slaughtered on the farm at around 12 -14 weeks.The slaughter process is very simple and takes five minutes. The skin comes off in one pull. It makes a good muff when scraped, salted and tanned. The head and feet are discarded. Often falconers will use the head and feet for training their prey birds.
Tom slaughtering a rabbit

Rabbit meat is delicious. Older rabbits are made into rabbit stew. Stew can include almost any vegetable. Here is one of my basic rabbit stew recipes.

Rabbit Stew
4-6 Servings
3 - 4 lbs rabbit
6 potatoes, quartered
8 carrots, sliced
1 medium onion, chopped
1 teaspoon salt
1/4 cup beef consomme
3/4 cup beef broth
3/4 teaspoon pepper
1/4 teaspoon basil
2 bay leaves
1/4 teaspoon rosemary
1/4 teaspoon thyme


1 Cut rabbit into pieces. Layer onion, potatoes, and carrots in bottom of a crock pot. 2 Add spices to the pot. 3 Add rabbit, salt, pepper, consommé, and about 3/4 cup beef broth. 4 Cover and cook on low for 8 hours. Thicken gravy as desired. Serve with sweet potato biscuits.


Young rabbits or fryers are sautéed with garlic and butter and fresh chives or parsley. This is my favorite recipe that we serve mid summer at Fable using almost ripe pears from our neighbor’s pear trees.


Braised Rabbit with Pears Recipe
Serves 4
2 young rabbits, each cut into 6 to 8 pieces
salt and freshly ground pepper to taste
1/2 cup all-purpose flour
3 tablespoons olive oil
1 medium onion, finely diced
3 cups dry red wine
1 cup chicken broth
2 tablespoons balsamic vinegar
1 tablespoon brown sugar
2 bay leaves
2 sprigs fresh rosemary
1/2 teaspoon salt
2 firm, slightly not-quite-ripe pears; skin removed, cored and halved
3 tablespoons chilled butter


Directions:
Season rabbit pieces and dust lightly with flour. Heat oil in a large skillet over medium-high heat. Add onion and saute for 3 - 4 minutes. Add rabbit pieces and brown each evenly. Add wine, broth, vinegar, sugar, bay leaves, rosemary and salt. Bring to a boil, then reduce heat to medium-low. Cover and simmer for 30 minutes. Add pears to the pan, cover and simmer for 30 minutes more. Remove rabbit and pears and arrange on plates. Remove bay leaves and rosemary from pan. Whisk in butter until melted and spoon sauce over rabbit.


The Updike
Tom makes a great rabbit linked sausage with rabbit, pork, apple, salt, garlic and spices. We sell it in our farm store and at the farmers markets.


Rabbit Workshops
Tom recently gave a rabbit slaughtering presentation at the Callicoon market to a large group of people who are raising or thinking of raising rabbits for food. We held a rabbit workshop last summer and will repeat it this year if folks are interested. A description of the workshop:


Rabbit to Roaster
Rabbits are caged raised during kindling and transferred to pasture cages at weaning. See the rabbitry and pastured rabbit cages. Learn how to raise rabbits on pasture. Learn how to slaughter rabbits and break down the rabbits into parts used for stewing, braising, sautéing and grilling. A rabbit meat inspired lunch will be served. In Fable, the farm’s restaurant, participants will work together to prepare dinner using all parts of the rabbit (including the liver and kidneys) Dinner will be accompanied by the seasonal dairy and produce raised and harvested on the farm.
You don’t have to be a farmer to raise rabbits for meat. A backyard hutch is easy to make and works well for three to four does. And the slaughter process is so quick and easy that every family should be adding rabbit meat to their diets. The French eat a lot of rabbit and every farmers market in France sells live rabbits which are slaughtered a at the market or at home. We don’t have to be French to eat rabbit. Hop right into rabbit raising or buy rabbit meat at the farmers market Bon Lapintite!

Farmer selling live rabbits at Bayeux Market in Normandy France